|
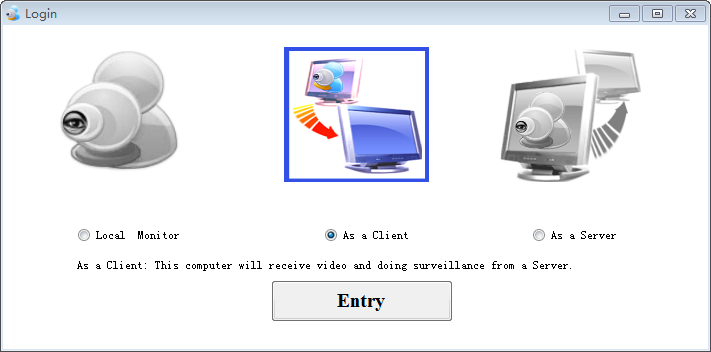
Client & Server |
  
|
|
Client & Server |
|
Part. A: As a Client
In this mode Webcam Surveillance Monitor will automatically detect connections and run with an IP Camera.
Webcam Surveillance Monitor will receive video signal from the Server Side (Part. B).
1. Click Entry to login, it will take about 20 seconds to detect the IP Camera on server side automatically.
If it is failed to find a connection to IP Camera on server side, please follow Options - Camera - IP Camera to enter the exactly
IP address and Port which you can copied from the Server Side (Part. B)

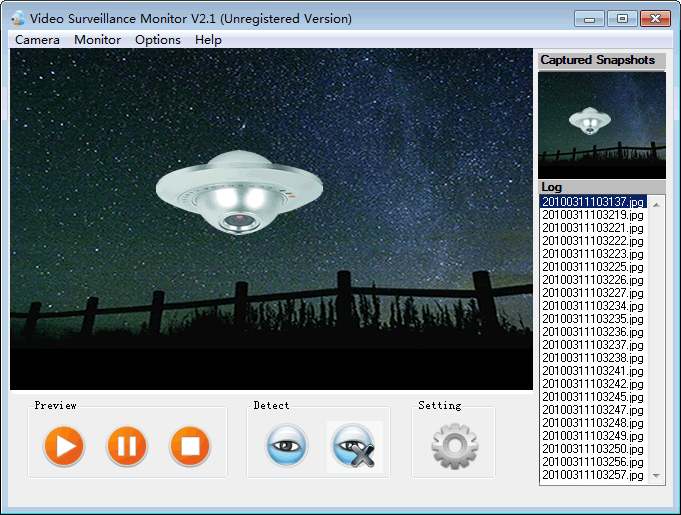
2. Click Start Preview button to view the live video form your Server Side IP Camera.
3. Click Pause Preview button to pause the video.
4. Click Stop Preview button to shut down your video camera.
5. Click Stat Detect button to start motion detecting on your Server Side IP Camera.
6. Click Stop Detect button to stop motion detecting.
7. Click Setting to configure Video Surveillance system to your personal using habit.
8. You can see the latest snap in Captured Snapshots.
9. You can view all the snaps in the snap Log area.
Note: Video Surveillance System will alarm you and capture the snaps when motion detected on the Server Side.
Part. B: As a Server
In this mode Webcam Surveillance Monitor runs on a remote computer which provides video to the Client Side.

1. Click Entry to login.
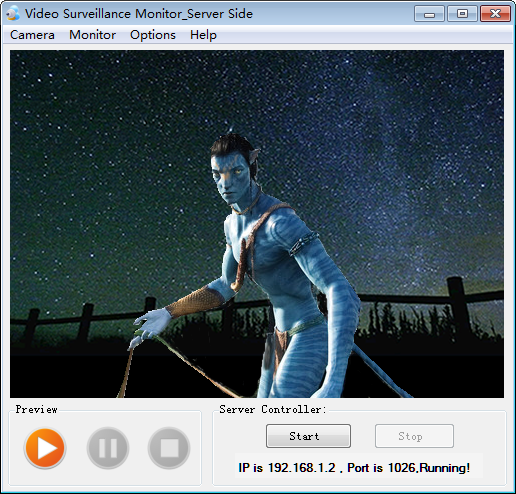
2. Click Start to Start Detect and display the IP address and Port which is needed on Client Side.
3. Click Stop to Stop Detect and shut down the video transfer.
Notes: Please copy IP address and Port to the Client Side of Webcam Surveillance Monitor before monitoring on Client Side;
In this mode, Server Side will not alarm when events happen, it works only as a video provider.